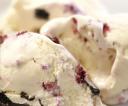
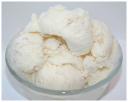
One of my fondest childhood memories is of eating homemade chocolate ice cream on the Fourth of July.  I can still hear in my mind the sound of my parents’ ice cream maker churning for hours in the bathtub. (Where it was placed to catch the water from all the condensation that would form.) I also remember the great fun we kids would have smashing blocks of ice into the crushed ice needed to fill the bucket around the ice cream canister. My mother would fill milk cartons with water and freeze them a few weeks before the holiday in preparation for the big day.
 Now that I’m a mother, I not only make ice cream on the Fourth of July, but on any day I want to give my family a special treat. Old fashioned ice cream makers like my parents’ are still out there, (you can even find ones that require hand churning) but I have one of the gel-canister types that is much less messy. Some advance planning is still necessary, as the canister must be frozen for at least twenty four hours before use, but if you store it in the freezer, you are always ready for spontaneous ice cream making.
Here are a few tips for making your own ice cream:
- The gel-canister should be completely dry before being frozen overnight.
- If you plan to store it in the freezer, place the canister in a bag to keep it free of crumbs and ice that might fall on it.
- Ice cream bases must be thoroughly chilled before processing.
- Processing times vary, start checking at around twenty minutes.
- Add nuts, etc. thorough the lid opening during the last few minutes of processing.
- Let the canister thaw completely before washing.
- Be gentle with the canister; some can be easily punctured by a sharp tool.
Chocolate ice creams are still my favorite, but vanilla is a big hit in this house as well. I have also found that a good vanilla base is a great start for fruit ice creams. Here are some basic recipes and variations from the manual that came with my Hamilton Beach ice cream maker, that I have used and enjoyed.
Old Fashioned Vanilla Ice Cream
¾ C sugar
dash of salt
1 ¾ c whole milk
2 eggs, beaten
1 ½ C heavy whipping cream
1 tsp vanilla
Combine the first three ingredients in a heavy saucepan, and cook over medium heat stirring until mixture is steaming. Reduce heat to low.
In a medium bowl whisk eggs and slowly whisk in half the hot mixture and then pour all back into the saucepan. Cook until slightly thick, about three minutes. Remove from heat and chill.
When ready to freeze, stir in heavy cream and vanilla. Follow directions for freezing in your ice cream maker.
Because that recipe requires advance preparations, and I tend to do my cooking on the spur of the moment, I use the next recipe most often. I also try to cut back on fat and calories where I can and I have found that I can turn this recipe into low fat ice cream (or ice milk) by substituting half and half for the cream and 2% milk for the whole milk. It is definitely a less creamy, icier dessert, but then I don’t have to feel so guilty eating it.
Easy Vanilla Ice Cream
1 C sugar
2 tsp lemon juice
2 C whipping cream
1 C milk
1 tsp vanillaCombine all ingredients, mix well and freeze according to manufacturers directions.
Some variations we enjoy:
Cookies and Cream– reduce the sugar to ½ cup and add about 15 broken chocolate sandwich cookies after about 15 minutes of churning.
Mint Chip – Substitute mint extract for the vanilla and add 1 cup mini chocolate chips after about 15 minutes of churning.
There are ice cream makers by Cuisinart, Delonghi, Salton and Rival. You can spend a simple thirty dollars on up to close to three hundred. Kitchenaid even makes an attachment that turns its mixer into an ice cream maker. My simple Hamilton Beach model has worked well for my family; it makes one quart, which serves everyone, (There are six of us.) but rarely leaves leftovers. I sometimes wish I could make a larger quantity, but for the most part this works, and part of the fun is making and eating a new batch.
